Do you own AirPods and want to use them with your Windows 11 PC? While AirPods are designed to work with Apple devices, you can still use them with a Windows 11 PC.
In this guide, we’ll show you how to connect your AirPods to your Windows 11 PC and start using them. Whether you have AirPods 2 or AirPods Pro, this guide applies to all generations of AirPods. So, let’s dive straight into the guide and get your AirPods connected to your Windows 11 PC.
Pair AirPods with Your Windows 11
Charge and Activate AirPods
Your AirPods come with a case. It is not only a storage case but also a charging case. You cannot make your AirPods work with any device (including Apple devices) unless you have the case. So, make sure you have it in place.
First charge your AirPods
The first basic thing you need to do is to charge your AirPods. To do so, simply place the earbuds in the case and charge the case either by attaching a charging cable or using the wireless charging method (whichever is applicable in your case).
You can charge the AirPods partially or completely. If you decide to charge the AirPods completely, a green indicator light inside the charging case will light up telling you that the AirPods and the charging case has been fully charged.
Detach the charging case from the charging unit.
Activate your AirPods
The next thing that you need to do is to activate your AirPods. To do that you will have to keep the earbuds inside the case and open the lid of the case.
Once you open the lid, look for a white circular button at the back of the charging case.
When you find the button, press and hold it for 3 seconds. You will see a white light flash.
Once the white light starts flashing, the AirPods are activated and are ready for pairing.
Activate Bluetooth on Your Laptop
Once your AirPods are active and ready for pairing, you need to turn your attention to your laptop. You will need to turn on the Bluetooth feature either by pressing a button on your keyboard (provided there is a shortcut button for that) or through the settings panel of the operating system.
How to activate Bluetooth through the settings panel?
We will be explaining the process using Windows 11. In case you have an earlier version like Windows 10, Windows 8, or Windows 7, the process will slightly vary but still, you need to do it through the settings panel.
- Step 1: Click on the Windows start button to pull up the start menu. Click on the Settings icon (which is a small cog icon) to bring up the settings panel.
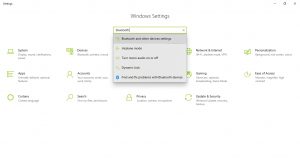
- Step 2: On the settings panel window, click on the search bar to activate it and type in the word ‘Bluetooth.’
- Step 3: You will see a dropdown list. Select the first option which reads “Bluetooth and other devices settings.”
- Step 4: On the next page that opens, you can see the option to turn on Bluetooth using a toggle switch. Toggle it ON to activate your PC’s Bluetooth.
- Step 5: After you toggle on the Bluetooth, click on the option which reads “Add Bluetooth or other device.” You can find this text written next to a + icon.
- Step 6: Once you click on that option, a popup will show up. In that popup window, select and click the first option which reads ‘Bluetooth.’
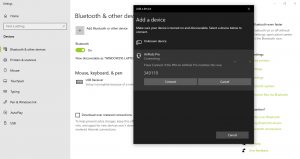
- Step 7: After you click on ‘Bluetooth,’ you can see a list of available Bluetooth devices. The AirPods should show up in the list.
- Step 8: Click on the AirPods and then click on the ‘Connect’ button.
That’s it! Your Windows 11 PC and AirPods should now be connected. It doesn’t matter whether you are using 1st generation AirPods, 2nd generation AirPods or AirPods Pro. The method is the same for all three.
Once your AirPods are connected to the PC, you can then go ahead and pull out the earbuds and put them in your ears.
Now play music or a video or start a Zoom call! Your AirPods will respond and play sound.


