HDR content is growing in popularity and is now widely available and supported by many devices and streaming services. With HDR, you get richer and more vivid picture from your games, videos and apps.
With Windows 11, enjoying HDR content is just a matter of enabling the feature through a toggle if your display supports it.
In this article, we will show you a step by step procedure on how to upgrade your multimedia experience with HDR on your Windows 11 PC. Read on!
Enable HDR on Windows 11
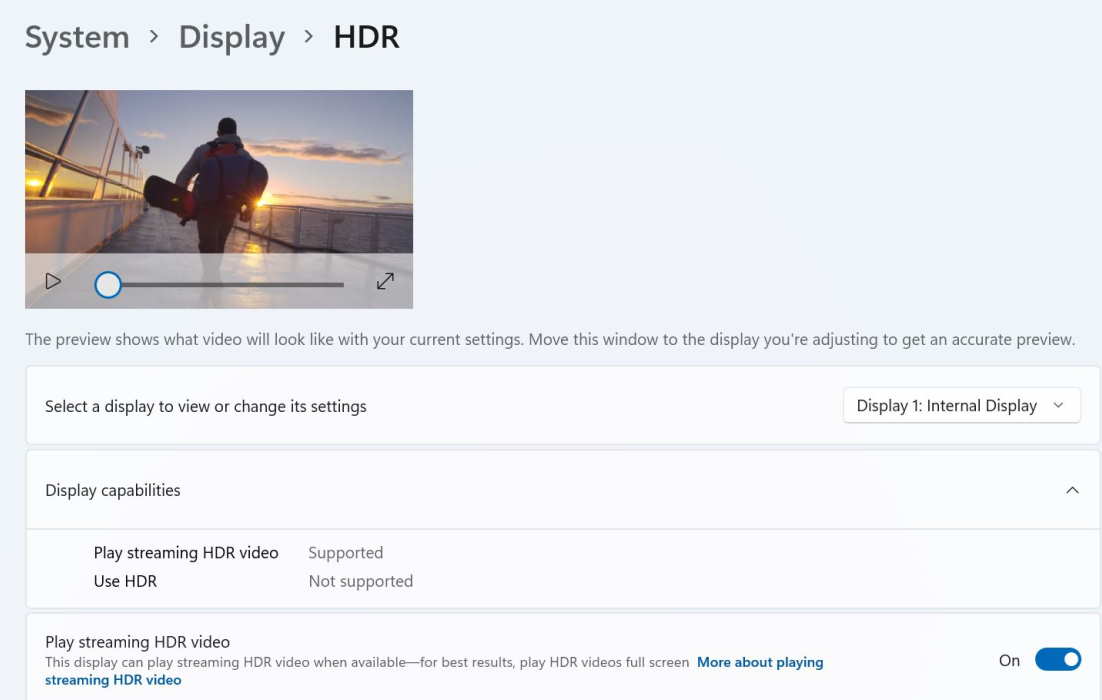
Follow the steps below to check if your display supports HDR content.
1. Click the Start menu on the bottom left corner and select Settings > System > Display.
2. On the top, select your display.
3. Select HDR or Use HDR.
4. Under Display capabilities, see if Play streaming HDR video and Use HDR are Supported or Not supported.
- If Use HDR is supported, the display supports HDR10.
- If Use HDR is not supported, the display is missing one or more requirements for HDR10.
- If Play streaming HDR video is supported, the display can play streaming HDR video when available.
5. To either Use HDR or Play streaming HDR video depending on if your display supports them, toggle the button next to the option to turn them on.
Calibrating display for HDR video
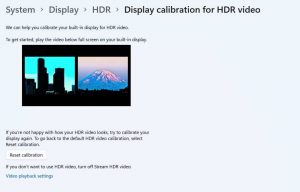
Windows 11 also provides a feature to calibrate your display to improve HDR video quality. Perform the following steps to recalibrate your display for HDR video.
1. Go to Settings > System > Display > HDR and tap on Display calibration for HDR video.
2. On the top, play the video full screen.
3. Next, adjust the slider within the video player until you find good balance of details in the picture.
4. When you are done, exit the full screen video.
5. Repeat the above steps if you don’t like the picture quality.
6. To go back to the default HDR video calibration, select Reset calibration.


