Have you ever been on a call and wanted to record it for later reference? Well, you’re in luck, because the Samsung Galaxy M54 has a built-in call recording feature that you can enable. In this article, we’ll show you how to activate this feature. So, let’s get started!
Steps to Turn on Call Recording on Galaxy M54
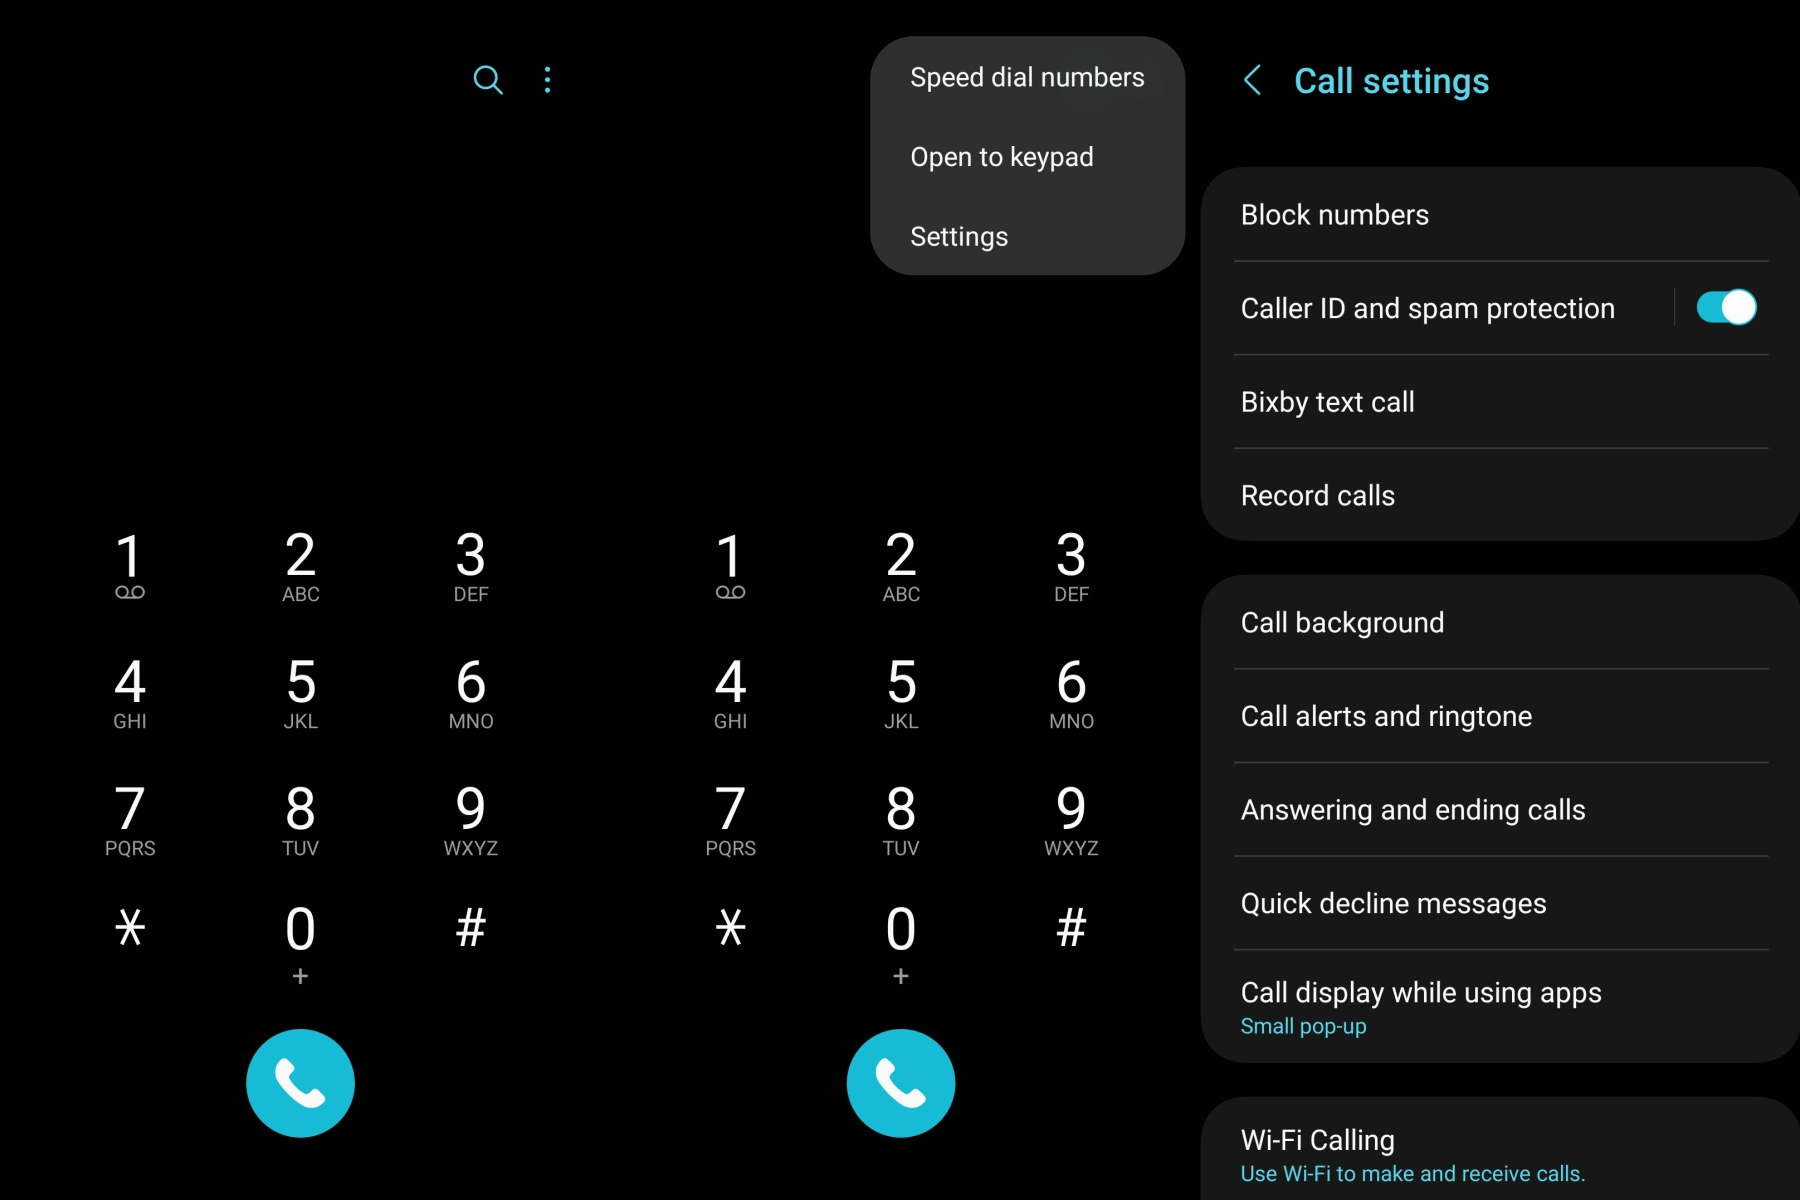
- Open the Phone app on your Samsung Galaxy M54.
- Tap the three-dot menu icon in the top-right corner of the screen.
- Select Settings from the dropdown menu.
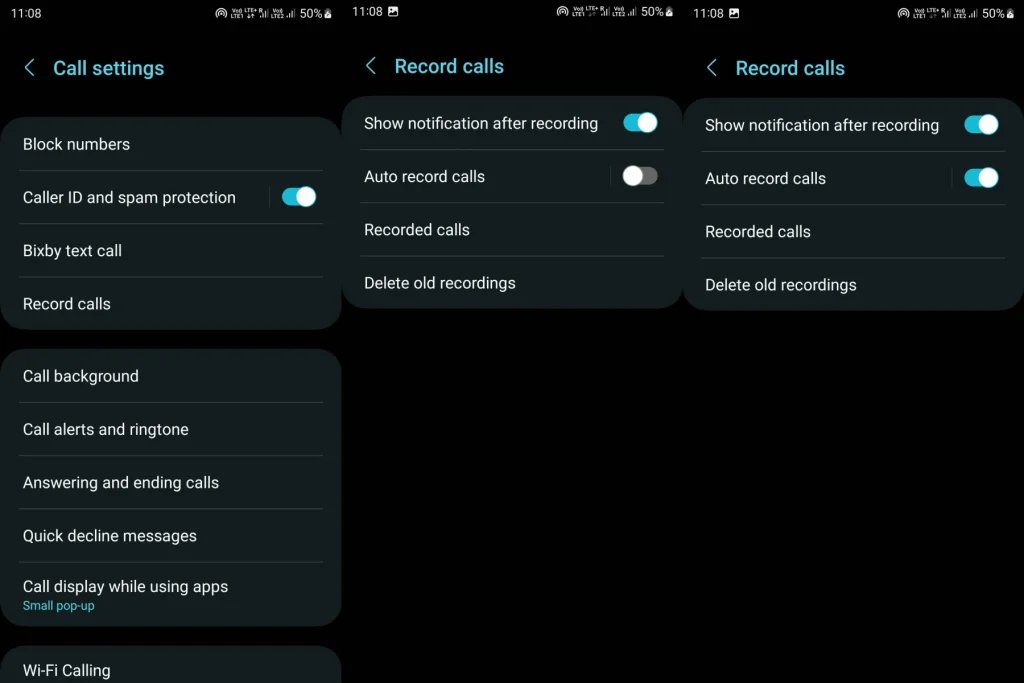
- Scroll down and select Record calls.
- Toggle the Auto record calls switch to turn on auto call recording.
- You can also choose to automatically record calls from specific contacts or all calls.
- Under the Auto record calls switch, you’ll find options to Auto record all calls or Auto record specific numbers or Auto record unsaved numbers. Tap on your preferred option and follow the on-screen instructions to configure your call recording preferences.
Once you’ve enabled call recording, you can access your recorded calls directly within the Phone app. Simply tap on the Recorded calls option in the call recording settings menu.
In the Recorded calls section, you’ll see a list of your recorded calls, sorted by date and time. Tap on the call you want to listen to, and the recording will start playing.
Alternative Method to Access Recorded Calls
If you prefer to access your recorded calls through your phone’s internal storage, you can do so by following these steps:
Open the My Files app on your Samsung Galaxy M54.
In the My Files app, tap on Internal storage and then locate the Recordings folder. Open the Recordings folder and then tap on the Call folder to access your call recordings.
It’s actually quite simple to enable call recording on your Samsung Galaxy M54. We hope you found this guide useful.


